fbpx

recipe developer . podcast co-host . cookbook author . photographer . mental health warrior . online educator


food . travel . life

keto . low carb


gluten-free . grain-free . sugar-free

drama-free . dogma-free . mean-free

Keto Cookbooks

Archives

Trending!

Keto and Low Carb Thickeners
Montana Hash
Recipe Index: Find the recipe you need here
Super Mother Clucker Burgers
Chicken and Cabbage Carbonara
Roast Chicken Casserole
Liposomal Vitamin C (+ VIDEO!)
Oven Bacon and Eggs for Two
Hot Bacon and Cabbage Slaw
Happy Healthy Keto Ingredients

Copyright © Carrie Brown 2010-2020, unless otherwise stated. All rights reserved.

Easy Salsa Fresca

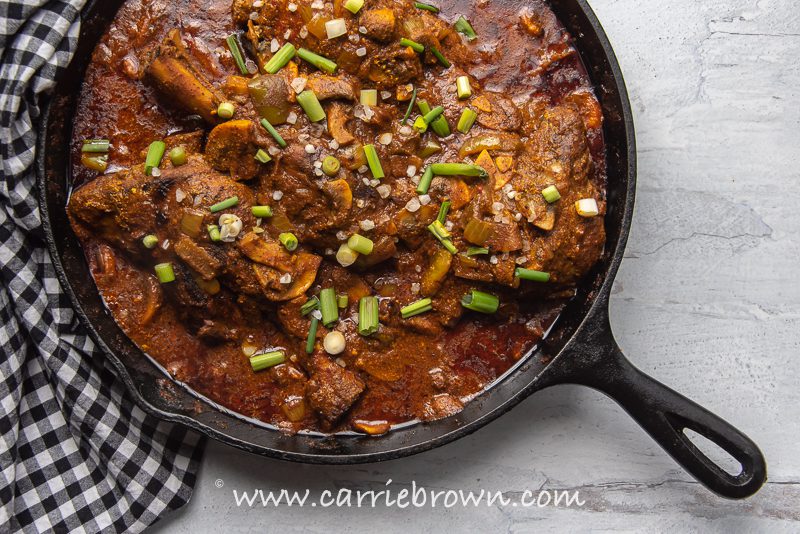
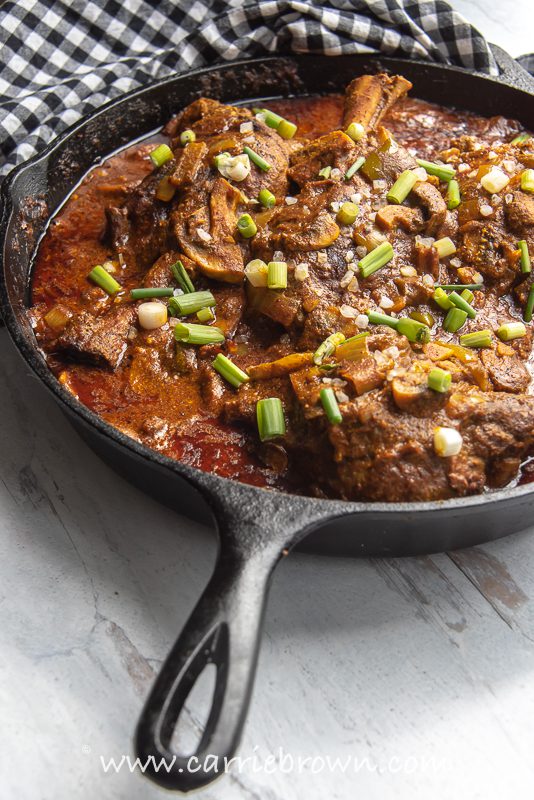
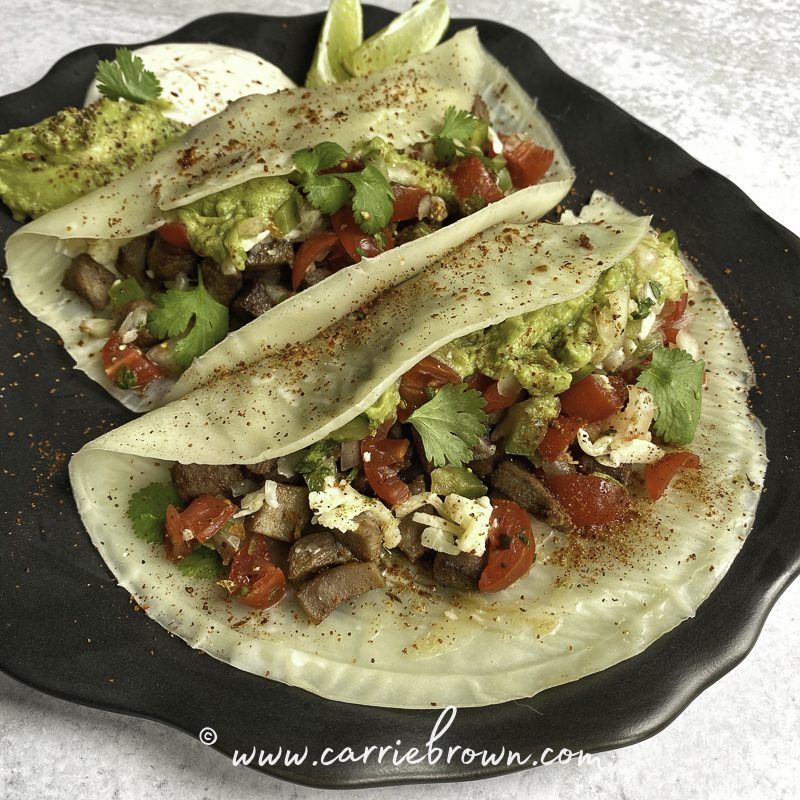
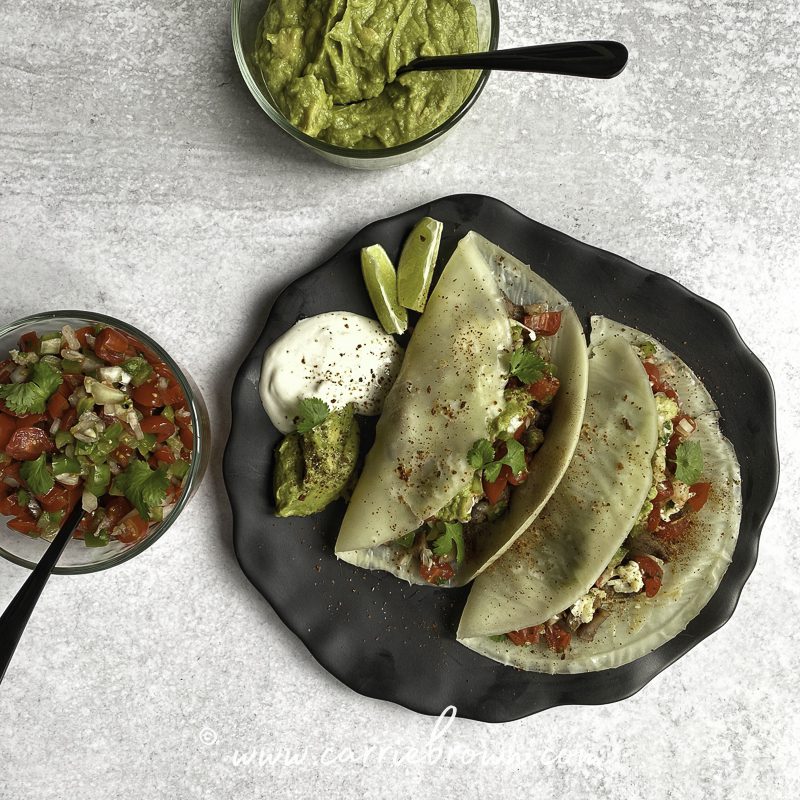
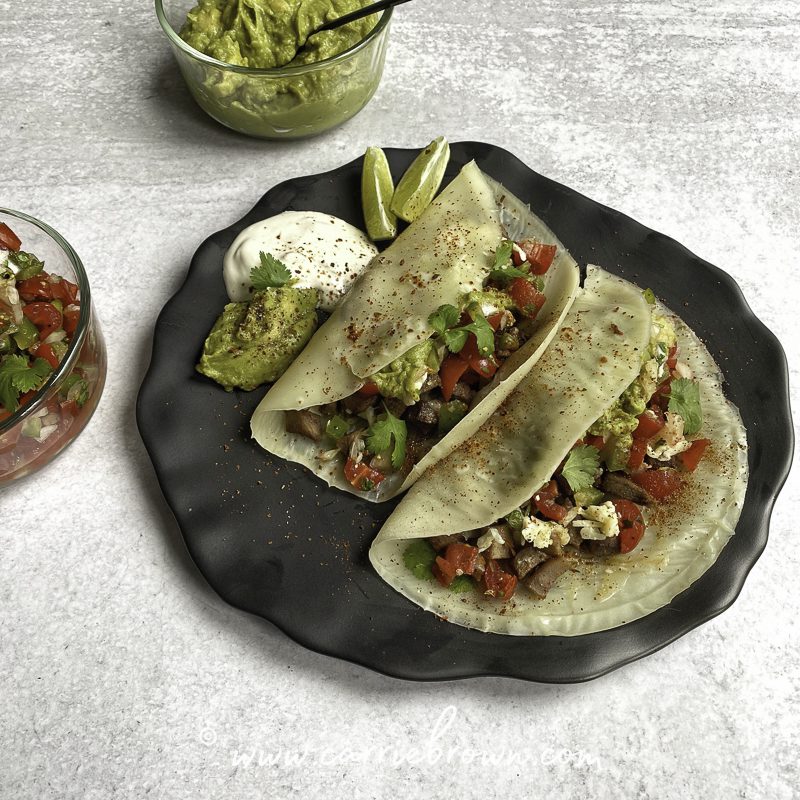
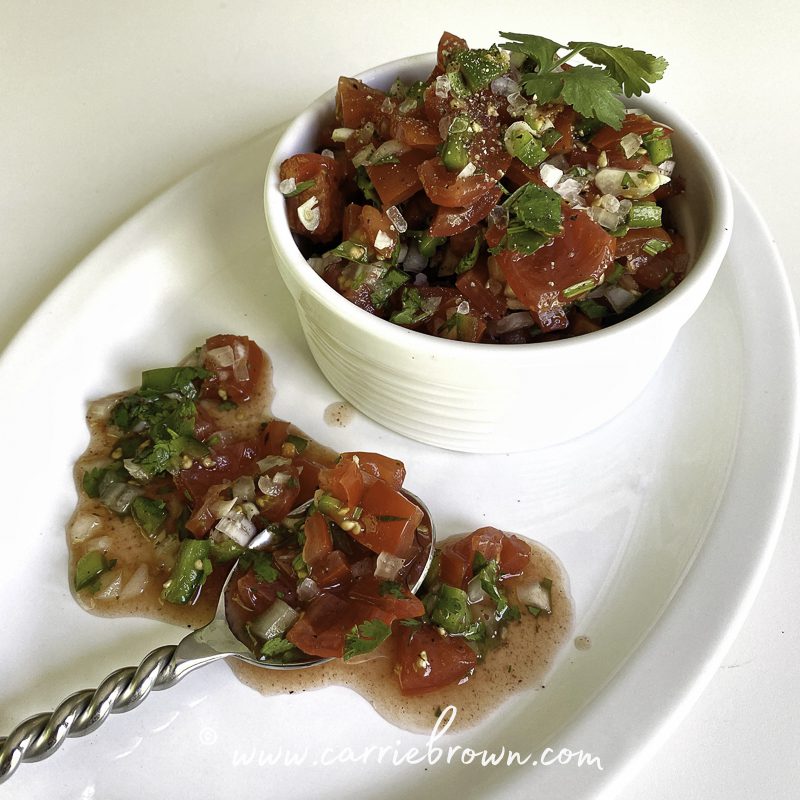
This Easy Salsa Fresca is a a super simple recipe for one of the most popular condiments in the Americas, and one of my personal favorite versions of salsa.  This is a delicious, easy, nutrient dense recipe that goes great with our Tacos de Lengua recipe, taco salads, as alternative toppings for burgers, and so much more. It’s also super pretty. Look how fresh and vibrant it looks!

Easy Salsa Fresca | Yogi Parker

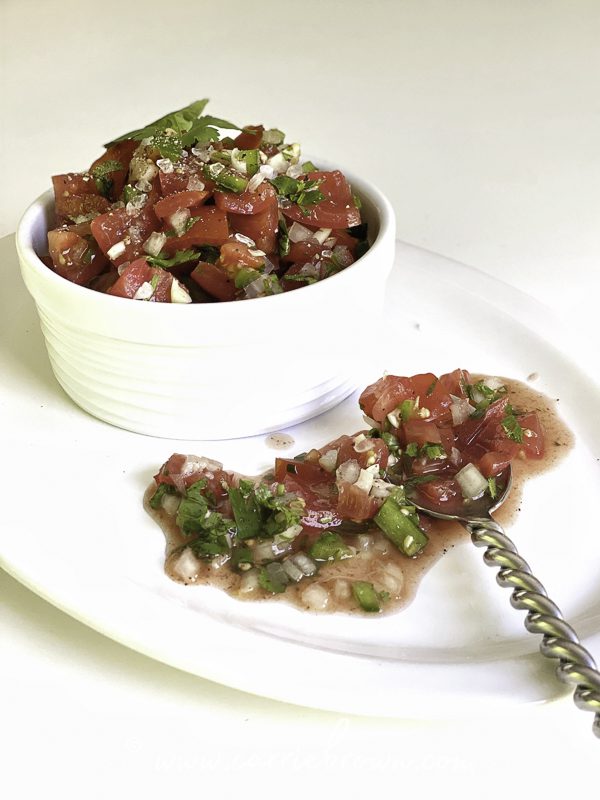
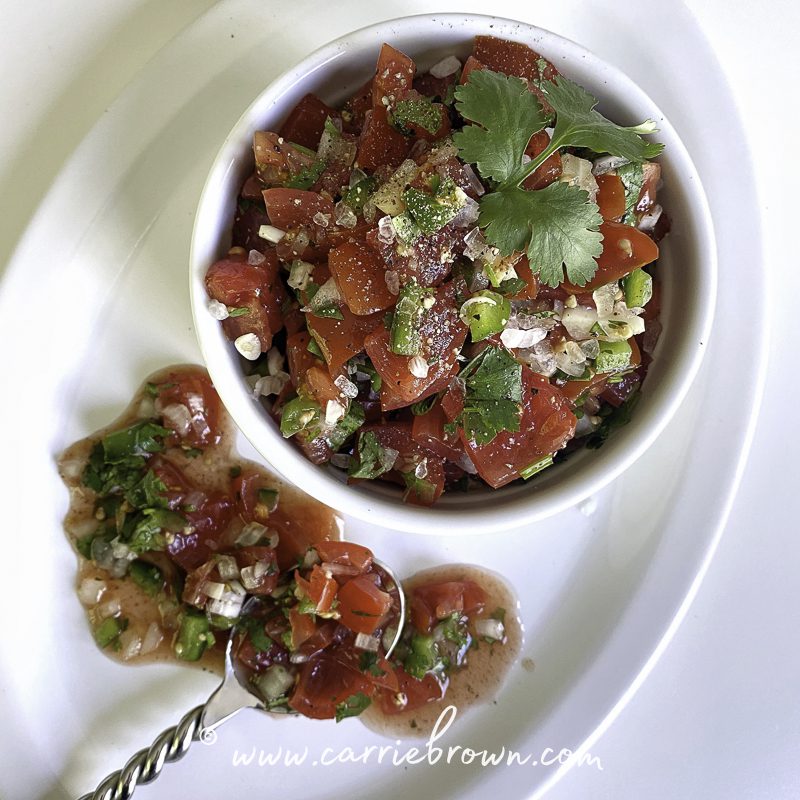
It comes together in a few minutes from ingredients you likely already have on hand and can really spice up a ton of dishes with fantastic color and flavor. Spoon it on everything! Eggs, burgers, tacos, ground meats, in sandwiches, on chili, oh the things you can do!

Make a big old batch and keep it in the fridge to use over a couple weeks making simple meal prep fast and easy. Sometimes all it takes to go from blah to blimey! is a dollop or two of a really great salsa, sauce or dressing. BOOM!


Easy Salsa Fresca

Author: Yogi Parker| Prep time:  10 mins   |   Cook time:  0  |   Total time: 10 mins + chilling time |  Serves: 12 -16

What You Need

  • 12 oz. / 335g diced tomatoes
  • 4 oz. / 110g minced onion
  • 1 hot pepper, seeded and minced (jalapeño, habanero, or whatever is your favorite)
  • 1 clove garlic, minced
  • 2 oz. / 55g fresh cilantro, chopped
  • 6 TBSP lime juice
  • 1 tsp. ground cumin
  • 1 tsp. chili powder
  • Sea salt (For the best salt and a 15% discount use code: carriebrown)
  • Ground black pepper

What You Do

  1. Place the tomatoes, onion, minced hot pepper, minced garlic, cilantro, lime juice, ground cumin, and chili powder in a large mixing bowl and mix together well until completely incorporated.
  2. Add sea salt and ground black pepper to taste.
  3. Cover bowl and refrigerate for at least one hour to allow flavors to marry together and mellow.  

Top Recipe Tips

  • If you want to add some healthy fats, you can add a chopped up avocado, a teaspoon of avocado oil, or a teaspoon of MCT oil.
  • Use anywhere you would use a salsa.
  • I usually make the salsa the night before, and allow to sit in refrigerator over night before serving.
  • Will keep for about a week in an airtight container in the fridge.

Helpful Cooking and Recipe Links

Podcast Episodes and YouTube Videos


Easy Salsa Fresca | Yogi Parker


Keto YouTube Channel | Carrie Brown
The BEST Keto Cookbooks | Carrie Brown


THANK YOU FOR YOUR SUPPORT! YOU MAKE ALL THINGS POSSIBLE.

There *may* be an affiliate link or two in this post and I *may* receive a small commission from qualifying purchases in order to provide free content for you. As an Amazon Associate I earn from qualifying purchases.

0 comments
Add a comment...

Your email is never published or shared. Required fields are marked *

    Cast Iron Curried Lamb Shanks

    If you haven’t tried lamb lately – or at all (!!) – now’s the time, especially if you like things a little on the spicy side. Because these Cast Iron Curried Lamb Shanks are all that. I love curry because of the spiciness, and as a bonus the turmeric is great for inflammation. Slow-cooking and braising lamb shanks are a great way to make the meat fall-off-the-bone buttery tender. This definitely falls into the category of comfort food – especially when served over cauli rice or your favorite keto noodles.

    Cast Iron Curried Lamb Shanks | Yogi Parker
    Cast Iron Curried Lamb Shanks | Yogi Parker

    Although they have a fairly lengthy languish in the oven, the prep is fast and simple. You could totally prepare them earlier in the day – or the night before – cover and keep in the fridge and then pop them in the oven 2 1/2 hours before feeding time at your zoo. If it’s just you in your zoo freeze the remainder in single-serve portions for fast grab-and-reheat dinners at your fingertips.

    Another reason I love lamb is that it’s rich in carnitine which helps develop lean muscle and ups your metabolism to burn fat. Lamb is coming down in price and becoming much more available so I highly recommend you start getting lamb on your weekly rotation!


    Cast Iron Curried Lamb Shanks

    Author: Yogi Parker| Prep time:  5 mins   |   Cook time:  2 hours 45 mins  |   Total time: 2 hours 50 mins  |  Serves: 4

    What You Need

    • 3lbs / 1kg 345g bone-in lamb shanks
    • Sea salt (For the best salt and a 15% discount use code: carriebrown)
    • Ground black pepper
    • 3 TBSP avocado oil
    • 1 ½ oz. butter
    • 2 TBSP curry powder
    • 2 TBSP ground turmeric
    • 1 TBSP ground cumin
    • 1 tsp. ground cardamom
    • ½ tsp. ground allspice
    • 12 oz. / 335g stock or bone broth
    • 6 oz. / 170g tomato paste
    • 10 oz. / 280g Greek yogurt
    • 2 TBSP lemon juice
    • 10 oz. / 280g bell pepper, seeded and chopped
    • 6 oz. / 170g onion, sliced
    • 12 oz. / 335g mushrooms, sliced
    • ½ oz. / 15g garlic cloves, sliced
    • 1 cinnamon stick

    What You Do

    1. Preheat oven to 350F.
    2. Season each shank with sea salt and ground black pepper on all sides.
    3. Pre-heat a skillet on medium heat and add the avocado oil.
    4. When the skillet is hot, place lamb shanks in the skillet and sear each side to a golden brown color, but do not cook all the way,  leave the lamb mostly raw.
    5. After the lamb shanks are seared, remove them from the pan and set aside.
    6. Reduce heat to medium low.  
    7. Add the butter, allow it to melt and then add all the ground spices.  Using a whisk, mix the spices with the butter until it becomes a paste like consistency. 
    8. Add the bone broth, tomato paste, yogurt, and lemon juice and use a whisk to stir well.
    9. Add the bell pepper, onion, mushrooms, and garlic and mix to incorporate. 
    10. Add the cinnamon stick.
    11. Add the lamb shanks back into the skillet and roll them in the curry mixture to thoroughly coat each shank.
    12. Place the entire skillet in the oven and slow braise the shanks for 2 1/2 hours or until the lamb shanks are fall-off-the-bone tender.
    13. Remove skillet from the oven and allow dish to rest for ten minutes before serving.
    14. Garnish with some fresh cilantro leaves or chopped green onions.

    Top Recipe Tips

    • If you want additional heat, dice up some of your favorite hot peppers and add them when you add the mushrooms, bell peppers, garlic and onions. Adding some diced ginger can also kick up the heat and add great flavor. Add as much as fits your tastes.
    • If you cannot find lamb shanks, some oxtail, beef roast, or bone in chicken can be used.
    • Serve by itself or on top of cauliflower rice, konjac rice or noodles, or squash noodles.
    • Serve with some keto bread like Fox Hill Kitchen Bunz  (Use code: carrie for a 15% discount!) to sop up all those delicious curried juices.

    Helpful Cooking and Recipe Links

    Podcast Episodes and You Tube Videos

    Cast Iron Curried Lamb Shanks | Yogi Parker


    Keto YouTube Channel | Carrie Brown
    The BEST Keto Cookbooks | Carrie Brown


    THANK YOU FOR YOUR SUPPORT! YOU MAKE ALL THINGS POSSIBLE.

    There *may* be an affiliate link or two in this post and I *may* receive a small commission from qualifying purchases in order to provide free content for you. As an Amazon Associate I earn from qualifying purchases.

    0 comments
    Add a comment...

    Your email is never published or shared. Required fields are marked *

      Tacos de Lengua

      Tacos de Lengua is a Mexican street food that I used to love to get whenever I was surfing or on scuba trips in Baja. I remember it’s crispy-fried goodness in a soft corn tortilla with cilantro, onions and lime. One food that I feel real nostalgic for is Mexican food because it’s reminds me of all the wonderful times that I had camping and surfing in Mexico. This is definitely one that brings up the warm fuzzies for me.

      Tacos de Lengua | Yogi Parker
      Tacos de Lengua | Yogi Parker

      These Tacos de Lengua are made with tongue which is a great – but very underutilized – meat. It’s inexpensive so works great on a budget and is absolutely delicious when slow-cooked, then cut up and fried crispy.

      Slow-cook a couple of tongues at once, chop and fry until crispy and then put half in the freezer for some fantastic ready-to-go taco, wrap, or salad meat!


      Tacos de Lengua

      Author: Yogi Parker| Prep time:  15 mins   |   Cook time:  6 hours  |   Total time: 3 hours 15 mins  |  Serves: 6 – 8

      What You Need

      • 2.5lb / 1120g beef tongue
      • 2 or 3 bay leaves
      • 1 TBSP whole peppercorns
      • 1/2 TBSP dried oregano
      • 2 tsp. dried sage
      • 1 tsp. coriander seed
      • 1 tsp. cumin
      • 12 oz. / 335g onion peeled and sliced
      • 2 oz. / 55g garlic cloves crushed
      • 12 oz. / 335g seeded and chopped green chilies
      • enough water to cover the ingredients
      • 1 TBSP sea salt   http://shop.redmond.life?aff=96 Code: carriebrown

      What You Do

      1. Put all the ingredients in your slow cooker or Instant Pot and slow cook on the high setting for 3 hours.
      2. After cooking, remove the tongue and peel the outer layer of rough skin from the tongue.  Chop the tongue into small bite size cubes.  To serve, crisp up the pieces of tongue by frying them in lard, tallow, avocado oil, coconut oil, or butter, and season with salt and pepper while hot.  You can also season with some chili powder and lime juice.  
      3. You can put the meat in the keto taco shell or wrap of your choice (https://amzn.to/3ezIMov), or you can make a taco salad, and omelette, torta, or keto sandwich bread.  You can really get creative with this.  We used Folio Cheese Wraps for the pictures.


      Top Recipe Tips

      • If you make taco salad, try adding some cheese crisps for crunch.  You can also make this on the stove top if you do not have a slow cooker or Instant Pot by simply adding all the ingredients to a pot, bringing to a boil and then lowering the temperature, covering with a lid, and allowing the meat and seasonings to simmer for three hours.

      Helpful Cooking and Recipe Links

      Podcast Episodes and YouTube Videos

      Substitutions

      • Don’t. Just buy the correct ingredients and you, too, shall have a fabulous outcome!

      Tacos de Lengua | Yogi Parker
      0 comments
      Add a comment...

      Your email is never published or shared. Required fields are marked *

        Super Seafood Stuffed Avocados

        I love dishes focused on nutrient density and anti-inflammatory properties and these Super Seafood Stuffed Avocados totally fit that bill by combining sardines and cod liver in with tuna. You can disguise the super-foods for people who might have an aversion to them by adding them to tuna – something that most everyone seems to love! This dish is also rich in iodine, B vitamin complex, calcium, several minerals including magnesium and vitamin D3.

        Super Seafood Stuffed Avocado | Yogi Parker
        Super Seafood Stuffed Avocado | Yogi Parker

        These Seafood Stuffed Avocados are a great way to have a fast, filling meal with essential nutrients and healthy fats without having to slave in the kitchen.

        Adding caviar – that’s the bright blue and orange stuff in the picture – to these Super Seafood Stuffed Avocados as a topping will make this into a very potent brain food.


        Seafood Stuffed Avocados

        Author: Yogi Parker| Prep time:  15 mins   |   Cook time:  0  |   Total time: 15 mins  |  Serves: 4

        What You Need

        • 4.3oz. / 121g canned cod livers
        • 3.75oz. / 106g canned sardines
        • 5.7oz. / 161g canned tuna
        • 1 oz. / 30g celery, finely chopped
        • 1½ oz. / 40g bell peppers, finely chopped
        • 1 oz. / 30g onion, minced or very finely chopped
        • ½ TBSP minced garlic
        • 2 oz. / 55g cucumber, chopped
        • 4 oz. / 110g mayonnaise
        • 1 TBSP fresh dill, finely chopped
        • 4 large avocados (or 8 small avocados)
        • Sea salt and ground black pepper (Get the best sea salt here and use code: carriebrown for 15% discount!)

        What You Do

        1. Open and drain the can of cod livers and place the drained liver into a bowl. Using the back of a fork mash the cod livers until they are almost a paste.
        2. Open and drain the sardines, put them into the bowl with the cod livers and mash with a fork to break them up.
        3. Open and drain the tuna, add to the bowl with the livers and sardines and use a fork to mix them together well.
        4. Add the veggies, mayonnaise, and dill and mix well.
        5. Cut the avocados in half, remove the seed and use a spoon to scoop out some of the fruit to make a larger space for the seafood salad.  Scoop the seafood salad into the avocado, season with some salt and pepper to taste and serve.  How many avocados you make will depend on the size of avocados you can get.  


        Top Recipe Tips

        • Ahi, yellowtail, and other types of tuna are great in this dish, as is fresh salmon.  Octopus is also great.
        • If you want to spice things up a bit, add some red pepper flake or some sambal oelek (chili pepper paste).

        Helpful Cooking and Recipe Links

        Podcast Episodes and YouTube Videos

        Substitutions

        • Don’t. Just buy the correct ingredients and you, too, shall have a fabulous outcome!

        0 comments
        Add a comment...

        Your email is never published or shared. Required fields are marked *

          Cardamom Chia Custard

          This, lovely people, is not your average chia pudding. No sirree. This is Cardamom Chia Custard and it is quite magnificent. It’s elegant, dinner-party-worthy, and downright delicious. You should make some today. And eat it tomorrow. It’s better when left overnight to loll in the fridge.

          Cardamom Chia Custard | Carrie Brown

          If you haven’t yet got around to making the Awesome Almond Custard, you really should. It tastes delicious, it is ridiculously easy to make, and it can be used in so many different ways.

          I even made you a video so that you can see I am not fibbing about fantastic custard being easy. If you thought custards were scary to make, fear not! You shall be a Custard-making Ninja in minutes!

          Once your Almond Custard is made this Cardamom Chia Custard is just a hop and a skip away from being done. It’s true that once mixed it needs to languish in the fridge overnight so the chia can do it’s magical swelling thing, but then – then you will have a wonderful dessert ready and waiting for you.

          Cardamom Chia Custard | Carrie Brown

          The upside to the waiting part is that you can make this a day or two ahead of when you need it – reducing last minute work and stress, especially if you are sharing it with family and friends. If including it as part of a dinner, it’ll be one less thing to think about on The Day.

          Cardamom Chia Custard

          Author: Carrie Brown | Prep time: 5 mins | Cook time: 0 mins | Total time: 5 mins + overnight in fridge | Serves: 4

          What You Need

          • 1 cup / 8 fl oz. Almond Custard (make ahead!)
          • ½ cup / 4 fl oz. almond milk
          • ¼ cup / 2 fl oz. heavy cream
          • ¾ tsp. ground cardamom
          • ¼ cup chia seeds

          What You Do

          1. Put the Almond Custard, almond milk, heavy cream, and ground cardamom in a bowl (preferably a Pyrex bowl (or similar) with a lid) and whisk together well until completely combined.
          2. Add the chia seeds and mix quickly and thoroughly into the custard mixture.
          3. Cover with the lid or use plastic wrap if using a regular bowl and place in the fridge overnight (or at least 2 hours, but it’s better overnight).
          4. After chilling, stir very well before serving.

          Top Recipe Tips

          • You can use whatever nut milk you have on hand.
          • You can use thick (canned) coconut milk instead of heavy cream but the flavor will be slightly different.

          Helpful Cooking and Recipe Links

          Podcast Episodes and You Tube Videos

          Substitutions

          • Don’t. Just buy the correct ingredients and you, too, shall have a fabulous outcome!
          • You can use whatever nut milk you have on hand.
          • You can use thick (canned) coconut milk instead of heavy cream but the flavor will be slightly different.


          Cardamom Chia Custard | Carrie Brown
          0 comments
          Add a comment...

          Your email is never published or shared. Required fields are marked *