fbpx

recipe developer . podcast co-host . cookbook author . photographer . mental health warrior . online educator


food . travel . life

keto . low carb


gluten-free . grain-free . sugar-free

drama-free . dogma-free . mean-free

Keto Cookbooks

Archives

Trending!

Dark Chocolate Chili Mole
Keto and Low Carb Thickeners
How To Cook A Pork Chop
How To Cook Pork Chops (+ VIDEO!)
Recipe Index: Find the recipe you need here
The KETO Ice Cream Scoop Cookbook
Grass-fed V. Grain-fed And How To Cook A Perfect Steak Without A Grill
Avocado and Walnut Salad
Montana Hash
How To Stock a Low Carb Kitchen

Copyright © Carrie Brown 2010-2020, unless otherwise stated. All rights reserved.

Super Mother Clucker Burgers

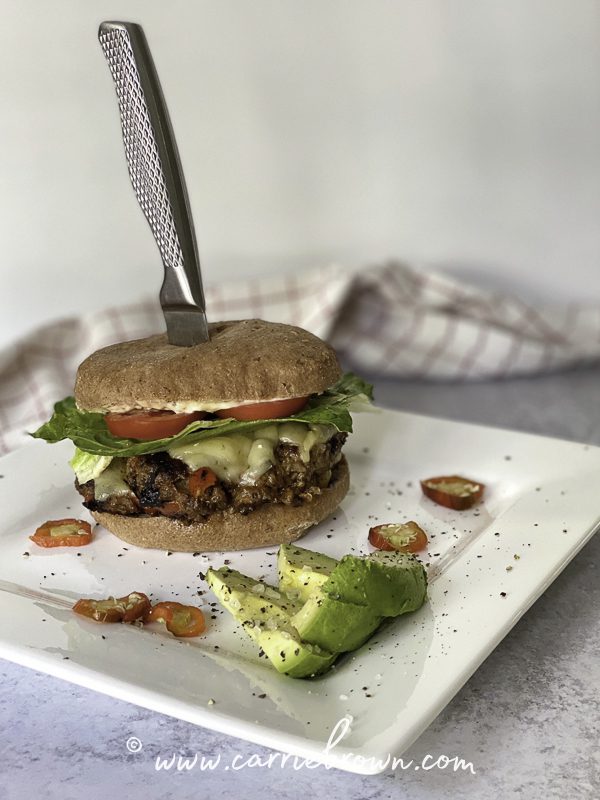
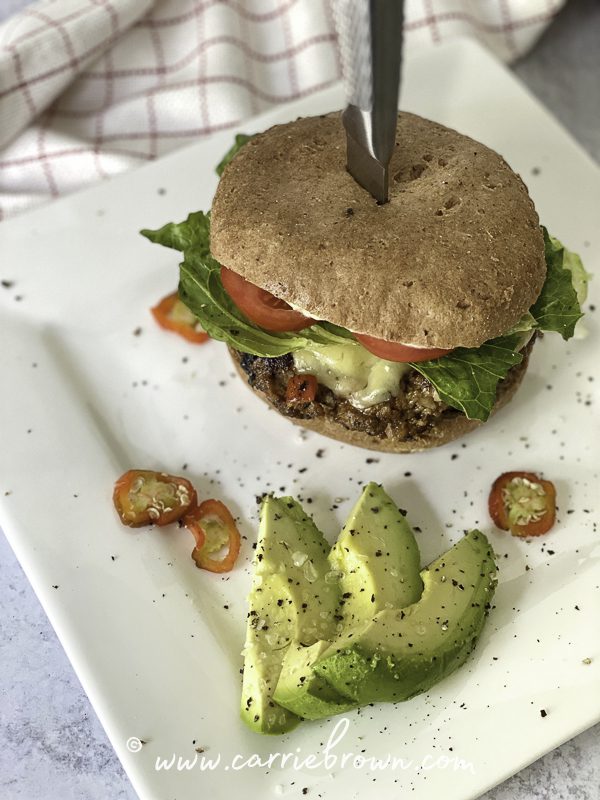
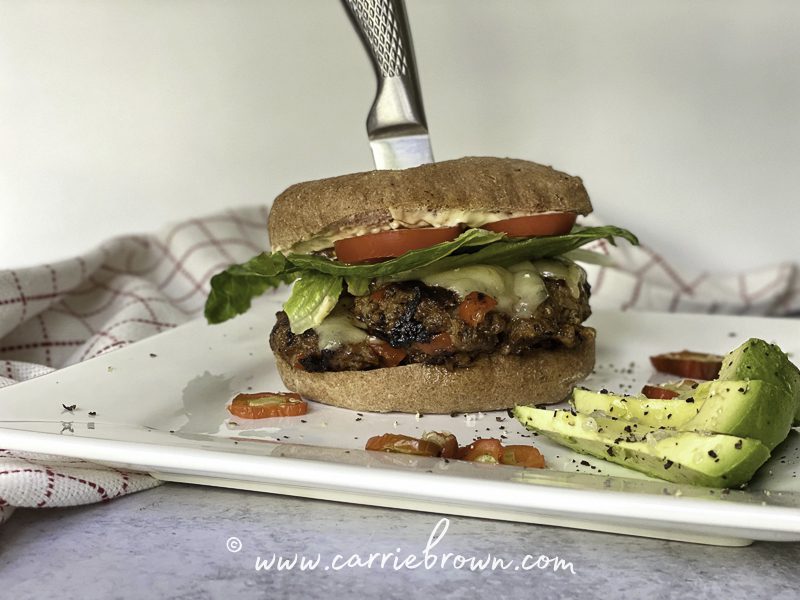
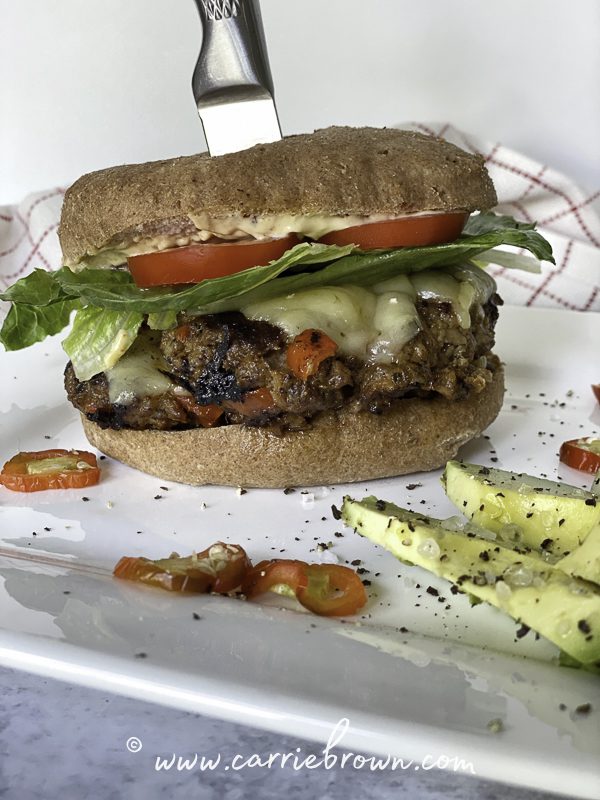
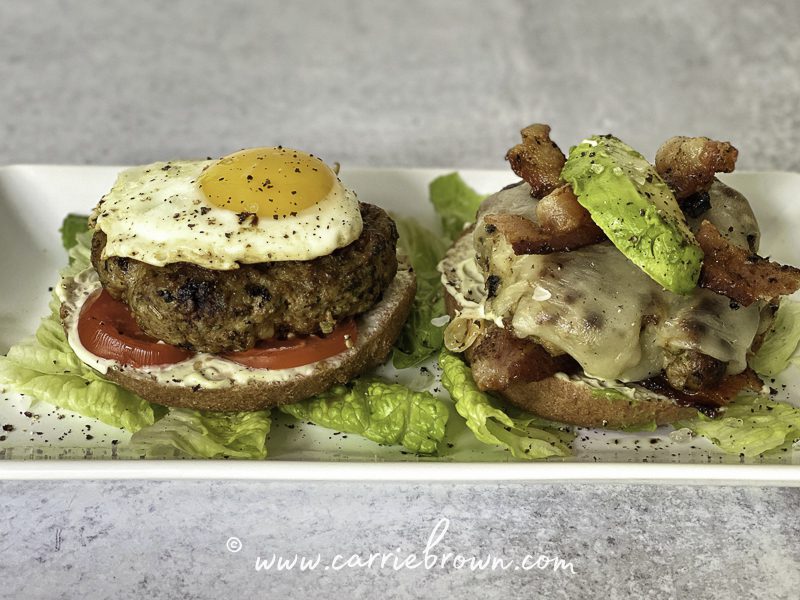
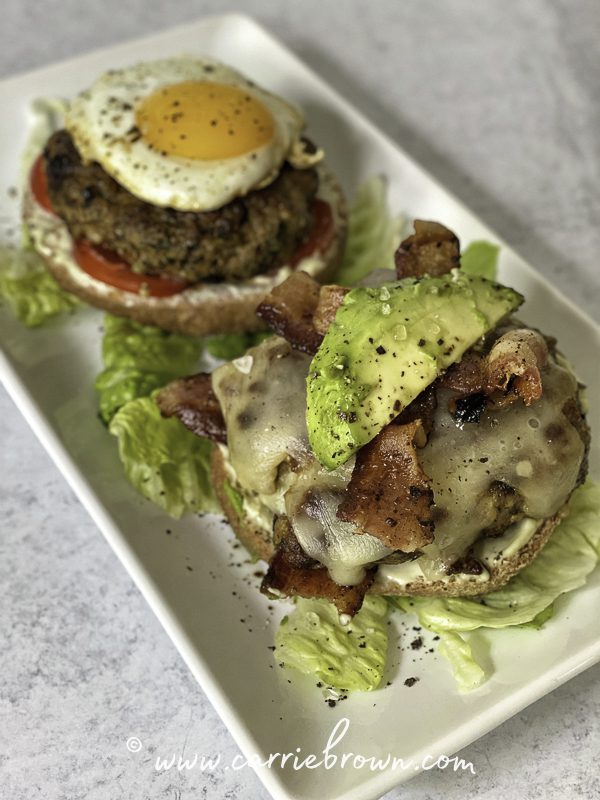
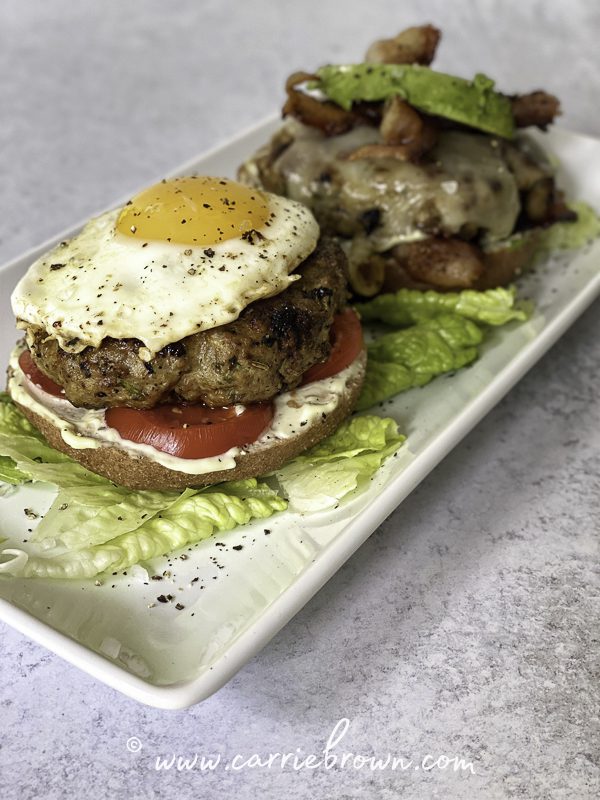
Here is a super power burger that is not only delicious, it hits those keto macro ratios, and also delivers a punch of bio-available nutrients to your body. How you may ask? Well the answer to that is simple…..LIVER! Liver is among the most nutrient dense super-foods on earth, but unfortunately many people don’t like it or are squeamish at the thought of consuming this powerful super-food. Here at the Carrie Brown Clubhouse, though, we got your back. We worked hard to come up with some delicious recipes that you can eat and not even realize you are chowing down on the magical-super-duper-food liver. In our line-up of burgers to turn you into a super-human we give you: Super Mother Clucker Burgers. You know you want some of those.

Super Mother Clucker Burgers | Yogi Parker

First you have to grind the meat and the quantities you need for this recipe are in the ingredients below. Here is what you do: You can start with ground chicken, or you can grind your own. If you are grinding your own, I recommend you use chicken thighs. You can use a meat grinder if you have one, or you can use a food processor. Cut the chicken thighs into strips or chunks that can fit into the hopper of your meat grinder. That size can vary based on the type of grinder you have. For a food processor, cut the meat into chunks that can fit easily into your food processor’s feed tube, and again, the size can vary based on the size of your food processor.

Cold is your friend, heat is not.  If your meat is too warm, it will turn into mush when you are grinding it, so you want to get it nice and cold.  My suggestion is to lay the meat out on a parchment lined baking tray so that each piece of meat is separated and not touching each other.  Place the tray of meat into the freezer for 30 minutes to one hour depending on how thick the meat is.  You want to get the meat to where it is just starting to freeze but is not completely frozen.  You can then grind the meat and it will not become a mushy mess.

DO NOT FREEZE THE MEAT SOLID.   It will not grind and possibly break the grinder.

Super Mother Clucker Burgers | Yogi Parker

Liver can easily turn into a puddly mess when ground, so here are some steps to help maintain a firmer texture when grinding. Rinse and drain the liver very well to get the blood off. To make the texture firmer, marinate the liver in yogurt for at least 8 hours. Make sure the yogurt completely covers the liver. The acid in the yogurt will help the liver gain a firmer texture. Once marinaded, rinse the yogurt off the chicken livers and discard it. Pat the chicken livers dry. Chicken livers are likely already small enough to fit into the hopper of your grinder or food processor, but cut them smaller if you need to. Place the chicken livers on a baking sheet and place in the freezer for about 30 minutes. Liver is delicate, and will not take as long to freeze as muscle meat. Get the liver to the point were it is almost frozen but not frozen solid. You can then grind the liver.

Another option – instead of marinading in yogurt – and for an even firmer texture is to lightly sear the liver in a skillet on each side before chilling and grinding. You do not want to cook the liver all the way, leave the inside mostly raw. This helps get some of the moisture out of the liver and makes for a grind with firmer texture and a sturdier patty.

Super Mother Clucker Burgers | Yogi Parker

Now you’ve got your meat and liver ground and ready you can continue with the rest of the ingredients and instructions for your Super Mother Clucker Burgers below.

If you’ve been nervous to try liver these Super Mother Clucker Burgers are a fabulous way to put on your training wheels! Give it a shot! We promise you will not taste the liver. At all. And anyone you feed them to will be none the wiser. You’re welcome!


Super Mother Clucker Burgers

Author: Yogi Parker| Prep time:  20 mins   |   Cook time:  20 mins  |   Total time: 40 mins + freezing  |  Serves: 3 – 6

What You Need

  • 1 lb. / 450g ground chicken
  • 8 oz. / 225g chicken livers
  • 2 eggs
  • 2 TBSP fennel seed
  • 1 TBSP ground sage
  • 1 oz. / 25g fresh parsley, finely chopped
  • 3 cloves garlic, minced
  • 1/2 cup grated Parmesan cheese
  • 1 oz. / 25g collagen
  • 1 tsp. konjac flour / glucomannan powder
  • sea salt and ground black pepper
  • OPTIONAL: Fox Hill Kitchen Bunz (Use code: carrie for a 15% discount!)

What You Do

  1. Place the ground chicken and liver in a large mixing bowl (see detailed instructions above).  Add in eggs, fennel seed, sage, parsley, garlic, Parmesan, and collagen.  Use your hands to start mixing and incorporating all the ingredients together.  As you mix the ingredients, slowly add the konjac flour (sprinkle some over the top, mix, sprinkle, mix, and repeat until the konjac flour is used up).  This will prevent the konjac flour from forming clumps.
  2. After you are done mixing you may find that your burger mixture has become a bit loose and soupy. Again, cold is your friend. Cover the bowl with a lid or some plastic wrap and place in the freezer for 30 minutes, or the refrigerator for a couple hours. The konjac flour will absorb excess moisture and the cold will firm the mixture up so you can make your patties.
  3. Portion out about 1/4 lb / 110g of meat for each patty. Roll the ground meat in your hands and form into meatballs then press each meatball into a flat patty. It will help with cooking if these patties are pressed thin, about 1/2 inch thickness
  4. Cold is your friend. The burgers hold together *much* better if they are completely frozen before they are cooked. Cut some parchment paper into squares slightly larger than the patties. Place the patties between the parchment papers so that the patties do not stick to each other. Place the patties in a seal-able container and freeze until solid. The liver is a very soft, delicate meat that makes the patties very fragile and they tend to fall apart very easily when cooked if not frozen first, so do not skip this step. This also means you can keep a supply of burgers in the freezer for whenever you want to have some and you do not have to cook right away. They can last several months in the freezer in a covered container.
  5. These burgers can be fragile, so I would not cook them on a grill. I suggest using a skillet. Add some oil – avocado oil, tallow, lard or coconut – to a skillet to prevent patties from sticking. You want to cook the patties on medium low or low heat. When your skillet is hot, place the patties on the skillet and cook for five minutes. Carefully flip the patties and cook for another five minutes, then repeat the process, cooking each side for another five minutes each side for a total of twenty minutes cook time. The Parmesan can burn and develop a hard crunchy burnt crust so make sure you don’t skip the flipping. Remove the patties from the heat and place them on a plate to rest for about five minutes before eating to ensure you have a nice juicy burger patty.


Top Recipe Tips

  • Have it any way you would have a burger patty; by itself, on a keto bun like a Foxhill Bakery bun or bagel with all the fixings, between two large sautéed portobello mushrooms, on your favorite salad or as a lettuce wrapped burger. These a r e also very much like sausage in flavor, so having them with your favorite breakfast foods like eggs and bacon is another fantastic option. You may want to have them between Carrie’s cheesy biscuits for a chicken and biscuit sandwich. the taste of liver, increase the ratio of bacon to liver by reducing the liver and doubling the bacon.
  • Serve on some keto bread like Fox Hill Kitchen Bunz  (Use code: carrie for a 15% discount!).

Helpful Cooking and Recipe Links

Podcast Episodes and You Tube Videos

Substitutions

  • Don’t. Just buy the correct ingredients and you, too, shall have a fabulous outcome!

Super Mother Clucker Burgers | Yogi Parker


0 comments
Add a comment...

Your email is never published or shared. Required fields are marked *

    Power Porkies Dry Chili Burgers

    Here is a super power burger that is delicious, it hits those keto macro ratios, and also delivers a punch of bio-available nutrients to your body. How you may ask? Well the answer to that is simple…..LIVER! Liver is among the most nutrient dense super-foods on earth, but unfortunately many people don’t like it or are squeamish at the thought of consuming this powerful super-food. Here at the Carrie Brown Clubhouse, though, we got your back. We worked hard to come up with some delicious recipes that you can eat and not even realize you are chowing down on the magical-super-duper-food liver. In our line-up of burgers to turn you into a super-human we give you: Power Porkies Dry Chili Burgers. Just the name makes you want to make them!

    Power Porkies Dry Chili Burgers | Yogi Parker

    First you have to grind the meat and the quantities you need for these Power Porkies Dry Chili Burgers are in the ingredients below. Here is what you do: You can start with ground pork, or you can grind your own. If you are grinding your own, I recommend you use pork shoulder. You can use a meat grinder if you have one, or you can use a food processor. Cut the pork shoulder into strips or chunks that can fit into the hopper of your meat grinder. That size can vary based on the type of grinder you have. For a food processor, cut the meat into chunks that can fit easily into your food processor, and again, the size can vary based on the size of your food processor.

    Cold is your friend, heat is not.  If your meat is too warm, it will turn into mush when you are grinding it, so you want to get it nice and cold.  My suggestion is to lay the meat out on a parchment lined baking tray so that each piece of meat is separated and not touching each other.  Place the tray of meat into the freezer for 30 minutes to one hour depending on how thick the meat is.  You want to get the meat to where it is just starting to freeze but is not completely frozen.  You can then grind the meat and it will not become a mushy mess.  Use the same process to prep your bacon for grinding.

    DO NOT FREEZE THE MEAT SOLID.   It will not grind and possibly break the grinder.

    Power Porkies Dry Chili Burgers | Yogi Parker

    Liver can easily turn into a puddly mess when ground, so here are some steps to help maintain a firmer texture when grinding. Rinse and drain the liver very well to get the blood off. To make the texture firmer, marinate the liver in yogurt for at least 8 hours. Make sure the yogurt completely covers the liver. The acid in the yogurt will help the liver gain a firmer texture. Once marinaded, rinse the yogurt off the liver and discard it. Pat the liver dry and cut the liver into strips or chunks that can fit into your food processor or the hopper of your meat grinder. Place the liver pieces on a baking sheet and place in the freezer for about 30 minutes. Liver is delicate, and will not take as long to freeze as muscle meat. Get the liver to the point were it is almost frozen but not frozen solid. You can then grind the liver. For best results, grind the liver with the bacon and you will get a firmer, better texture.

    Another option – instead of marinading in yogurt – and for an even firmer texture is to lightly sear the liver in a skillet on each side before chilling and grinding. You do not want to cook the liver all the way, leave the inside mostly raw. This helps get some of the moisture out of the liver and makes for a grind with firmer texture and a sturdier patty.

    Power Porkies Dry Chili Burgers | Yogi Parker

    Now you’ve got your meat and liver ground and ready you can continue with the rest of the ingredients and instructions for these fantastic Power Porkies Dry Chili Burgers below.

    If you’ve been nervous to try liver this is a fabulous way to put on your training wheels! Give it a shot! We promise you will not taste the liver. At all. And anyone you feed them to will be none the wiser. You’re welcome!


    Power Porkies Dry Chili Burgers

    Author: Yogi Parker| Prep time:  20 mins   |   Cook time:  20 mins  |   Total time: 30 mins  + freezing time |  Serves: 6 – 12

    What You Need

    • 1 lb. / 450g pork shoulder
    • 1 lb. / 450g bacon
    • 1 lb. / 450g beef or calf liver
    • 1 egg
    • 1 jalapeño, seeded and minced
    • 6 oz. / 170g onion, roughly chopped
    • 3 cloves garlic, minced
    • 2 TBSP chili powder
    • 1 TBSP chipotle powder
    • 1/2 TBSP ground cumin
    • 2 tsp. onion powder
    • 1/2 tsp. garlic powder
    • 1 tsp. mustard powder
    • 1 TBSP coconut aminos
    • 1 TBSP apple cider vinegar
    • 2 TBSP keto sweetener of your choice
    • 2 tsp. konjac flour / glucomannan powder
    • OPTIONAL: Fox Hill Kitchen Bunz (Use code: carrie for a 15% discount!)

    What You Do

    1. Place the ground pork, liver and bacon in a large mixing bowl (see detailed instructions above).  Add in the egg, minced jalapeño, chopped onion, garlic, chili powder, chipotle powder, cumin, onion powder, garlic powder, mustard powder, coconut aminos, apple cider vinegar, and sweetener.  Use your hands to start mixing and incorporating all the ingredients together.  As you mix the ingredients, slowly add the konjac flour powder (sprinkle some over the top, mix, sprinkle, mix and repeat until konjac flour is used up).  This will prevent the konjac flour from forming clumps.
    2. After you are done mixing you may find that your burger mixture has become a bit loose and soupy. Again, cold is your friend. Cover the bowl with a lid or some plastic wrap and place in the freezer for 30 minutes, or the refrigerator for a couple hours. The konjac flour will absorb excess moisture and the cold will firm the mixture up so you can make your patties.
    3. Portion out about 1/4 lb / 110g of meat for each patty. Roll the ground meat in your hands and form into meatballs then press each meatball into a flat patty. It will help with cooking if these patties are pressed thin, about 1/2 inch thickness.
    4. Cold is your friend. The burgers hold together *much* better if they are completely frozen before they are cooked. Cut some parchment paper into squares slightly larger than the patties. Place the patties between the parchment papers so that the patties do not stick to each other. Place the patties in a seal-able container and freeze until solid. The liver is a very soft, delicate meat that makes the patties very fragile and they tend to fall apart very easily when cooked if not frozen first, so do not skip this step. This also means you can keep a supply of burgers in the freezer for whenever you want to have some and you do not have to cook right away. They can last several months in the freezer in a covered container.
    5. These burgers can be fragile, so I would not cook them on a grill.  I suggest using a skillet.   Add some oil – avocado oil, tallow, lard or coconut – to a skillet to prevent the patties from sticking.  You want to cook the patties on medium low or low heat.  When your skillet is hot, place the patties on the skillet and cook for five minutes.  Carefully flip the patties and cook for another five minutes, then repeat the process, cooking each side for another five minutes each.  For 1/2 lb patties repeat and cook each side of each patty  for 3 five-minute cycles.  Remove the patties from the heat and place them on a plate to rest for about five minutes before eating to ensure you have a nice juicy burger patty.

    Top Recipe Tips

    • Have it any way you would have a burger patty: by itself, on a keto bun like a Fox Hill Kitchens Bakery bun with all the fixings, between two large sautéed portobello mushrooms, on your favorite salad, or as a lettuce wrapped burger.
    • Serve on some keto bread like Fox Hill Kitchen Bunz  (Use code: carrie for a 15% discount!).

    Helpful Cooking and Recipe Links

    Podcast Episodes and You Tube Videos

    Substitutions

    • Don’t. Just buy the correct ingredients and you, too, shall have a fabulous outcome!

    Power Porkies Dry Chili Burgers | Yogi Parker


    0 comments
    Add a comment...

    Your email is never published or shared. Required fields are marked *

      Cheesy Peppered Steak Soup

      This Cheesy Peppered Steak Soup is the third in a series of recipes that started life as a fabulously tasty Sheet Pan Meal that I then morphed the ingredient list into an entirely different meal. Giving you two different recipes for the same ingredients will help you budget, plan, and bulk buy without getting bored with what’s on the menu!

      Cheesy Peppered Steak Soup | Carrie Brown

      I am pretty sure I would not have come up with this particular combination in a soup if I hadn’t made the Sheet Pan Nutmegger Cheesesteak first. So I am really glad that sheet pan dinner went down, because this soup is delicious! I am a big fan of soups at the best of times and this made a perfect weeknight dinner with little time, no fancy ingredients, and meat that can easily kept on hand in the freezer.

      Those Fox Hill Kitchen Bunz – or whatever bread substitute you prefer – that you may have used to turn the Sheet Pan Nutmegger Cheesesteak into a fabulous keto Cheesesteak would also be wonderful to sop up this Cheesy Peppered Steak Soup with. I do like dunking bread in my soup, and those Fox Hill Kitchen Bunz are my favorite! Want those Bunz? We have a coupon for those! Click here and use coupon code: carrie for a 15% discount!

      Cheesy Peppered Steak Soup | Carrie Brown

      Shaved steak – typically found prepacked in the meat counter or in frozen food – is very, very finely sliced beef. The thickness of the beef makes it perfect for a quick soup it cooks very fast – no need to brown and cook the meat forever. The longest part is sauteing the veggies, then it all comes together in minutes.

      Want more or less veggies in your soup? Have at it. Want more or less beef? Go for it! Just keep the liquid, thickener and cheese amounts the same and you can use or or more meat and veggies depending on what you have, what your goals are, or what your carb and protein levels need to be.


      I suspect that you keep most of these ingredients on hand in your fridge and pantry so this makes a brilliant last minute “What can I eat?” meal. If this isn’t in your regular rotation it really needs to be!

      Cheesy Peppered Steak Soup

      Author: Carrie Brown | Prep time: 10 mins | Cook time: 20 mins | Total time: 30 mins | Serves: 4 – 6

      What You Need

      • 2 TBSP avocado oil or coconut oil
      • 8 oz. / 225g bell peppers, finely chopped
      • 4 oz. / 110g white or yellow onion, finely chopped
      • 5 oz. / 140g mushrooms, sliced
      • 1 lb / 450g shaved steak
      • Sea salt and ground black pepper to taste (Get the best sea salt here and use code: carriebrown for 15% discount!)
      • 3 cups / 1.5 pints beef stock
      • 2 cups / 1 pint almond milk
      • 1/4 cup / 2 fl oz. heavy cream
      • 2 tsp. apple cider vinegar
      • 1.5 tsp. konjac flour / glucomannan powder
      • 1/2 tsp. guar gum
      • 3 tsp. fresh parsley, finely chopped
      • 4 oz. / 110g smoked Gruyere
      • 4 oz. / 110g mozzarella

      What You Do

      1. In a large pan, heat the avocado oil over a medium heat and then add the chopped bell peppers, onions, and sliced mushrooms and saute until the veggies are just starting to soften.
      2. Add the shaved steak, season with sea salt and ground black pepper, stir well, and continue to saute for a further 5 minutes.
      3. Add the beef stock, almond milk, heavy cream, and apple cider vinegar and stir well.
      4. Bring the soup just to the boil then reduce heat to a simmer.
      5. Gently and evenly sprinkle the konjac flour over the surface of the soup while stirring very rapidly with the other hand to quickly incorporate it throughout the soup.
      6. Repeat the last process with the guar gum and continue stirring for 2 minutes until the soup has fully thickened.
      7. Add the fresh chopped parsley, the smoked Gruyere, and the mozzarella and stir until the cheeses are completely melted.
      8. Serve.


      Top Recipe Tips

      • You can also use sliced roast beef. Even though it is thicker, since it is roasted already you only need to heat it through.
      • You can use any mixture of cheeses that you prefer to vary the flavor, but for best results make sure you choose ‘melty’ cheeses.
      • If you only have dried parsley, reduce the amount to 1 tsp. and add it with the shaved steak earlier in the recipe.

      Helpful Cooking and Recipe Links

      Podcast Episodes and You Tube Videos

      Substitutions

      • Don’t. Just buy the correct ingredients and you, too, shall have a fabulous outcome!
      • See Top Recipe Tips above.
      Cheesy Peppered Steak Soup | Carrie Brown


      7 comments
      Add a comment...

      Your email is never published or shared. Required fields are marked *

      • AmyFor family members with nut allergies, what is a good sub for the almond milk?  Hemp milk?  ReplyCancel

        • MeredithI used SO Delicious Coconut Milk, no coconut taste at all. ReplyCancel

      • MeredithJust finishing this now, sure looks good. No saltines are one of my husbands few beefs about keto. I thin sliced some egg white bread and am toasting it now, we’ll pretend it’s crackers but if anyone has a recipe for something more like saltines, please let me know. ReplyCancel

      • MeredithJust finishing this now for supper, sure looks good. No saltines are one of my husbands few beefs about keto. I thin sliced some egg white bread and am toasting it now, we’ll pretend it’s crackers but if anyone has a recipe for something more like saltines, please let me know. ReplyCancel

      • MeredithMade this for supper tonight. Delicious! My husband’s only beef with Keto is no saltine crackers for his soup. I sliced as thin as possible some egg white bread and toasted it, we called them crackers, not bad but sadly they were not saltines. If anyone has come across a decent recipe for a saltine sub please let me know. TIA! ReplyCancel

      • MeredithSorry for all the additional comments. Didn’t look like any were posting and now I can delete the extras. I kept getting error messages saying they couldn’t find what I was looking for and/or to enter a website. Could be our lousy internet connection. Sorry again. ReplyCancel

      • MeredithSorry for all the additional comments. Didn’t look like any were posting until this morning and now I can’t delete the extras. I kept getting error messages saying they couldn’t find what I was looking for and/or to enter a website. Could be our lousy internet connection. Sorry again. ReplyCancel

      Sheet Pan Nutmegger Cheesesteak

      This is the third in a series of Sheet Pan Meals that I dreamt up to help you get great grub on the table really fast and with minimal prep. Fast food, if you will. Faster than going out for take-out and 32 billionty times more nourishing, not to mention entirely keto. And this Sheet Pan Nutmegger Cheesesteak is simply a riff on one of America’s most favorite fast food sandwiches: The Philly Cheesesteak. So, once again, you really do not have to go without all the things you love just because you care about your health. Woohoo!

      Sheet Pan Nutmegger Cheesesteak | Carrie Brown

      If you are not familiar with sheet pan dinners, they are essentially just all the things cooked in the oven on the same pan at the same time. A lot of sheet pan recipes you’ll find on the interwebs, though, call for adding a bunch of things at various different times throughout the cooking process, which in my mind kinda negates the whole point of a sheet pan dinner.

      Check out our Cooking Channel | Carrie Brown


      This Sheet Pan Nutmegger Cheesesteak is almost a proper sheet pan dinner: almost everything goes on the pan at the same time, gets shoved in the oven, and 20 minutes later the pan comes out again with everything perfectly cooked. This is a really easy way to make a pan full of delicious dinner, but I confess: you do have to open the oven door 5 minutes before the end for this particular recipe. Because cheese.

      Sheet Pan Nutmegger Cheesesteak | Carrie Brown

      When your Sheet Pan Nutmegger Cheesesteak is cooked you could even pile it onto large Fox Hill Bunz – or whatever bread substitute you prefer – and have a fabulous keto Cheesesteak in your mitts! Faster than you could get one from Subway. Plus, you know EXACTLY what is in it. BOOM!


      Want those Bunz? We have a coupon for those! Click here and use coupon code: carrie for a 15% discount!

      Sheet Pan Nutmegger Cheesesteak | Carrie Brown

      Shaved steak – typically found prepacked in the meat counter or in frozen food – is very, very finely sliced beef. The thickness of the beef is what makes it perfect for a sheet pan dinner because it cooks in the same time as the veggies. The only part that needs less cooking time is the cheese – so once the met and veggies are cooked, the cheeses get added and then the whole sheet pan gets 5 minutes under the broiler to make a delicious mess of meaty cheesy goodness.


      I suspect that you keep most of these ingredients on hand in your fridge and pantry so this makes a brilliant last minute “What can I eat?” meal. If this isn’t in your regular rotation it really needs to be!

      Sheet Pan Nutmegger Cheesesteak

      Author: Carrie Brown | Prep time: 10 mins | Cook time: 20 mins | Total time: 30 mins | Serves: 4 – 6

      What You Need

      • 1/2 cup / 4 fl oz. avocado oil or coconut oil
      • Sea salt and ground black pepper (Get the best sea salt here and use code: carriebrown for 15% discount!)
      • 4 TBSP coconut aminos
      • 1 TBSP ground nutmeg
      • 2 lbs / 900g shaved steak
      • 12 oz. / 335g bell peppers, thinly sliced
      • 9 oz. / 250g white or yellow onions, thinly sliced
      • 8 oz. / 225g mushrooms, sliced
      • 6 oz. / 170g mozzarella, shredded
      • 6 oz. / 170g gruyere, shredded

      What You Do

      1. Pre-heat oven to 400F.
      2. In a large bowl put the avocado oil, sea salt and ground black pepper, coconut aminos, and ground nutmeg and mix together well.
      3. Add the shaved steak, sliced bell peppers, onions, and mushrooms and toss in the seasoned all until everything is thoroughly coated.
      4. Spread the meat and veggie mixture onto one large or two half sheet pans.
      5. Place the sheet pan(s) on the middle shelf of your pre-heated oven and bake for 15 minutes until the beef is cooked.
      6. Turn the oven off and turn the broiler on.
      7. Carefully remove the pan(s) from the oven and spread the shredded cheeses evenly over the surface.
      8. Put the pan(s) under the broiler for 5 minutes until the cheeses have melted through the meat and veggies.
      9. Remove from under the broiler and serve.


      Top Recipe Tips

      • You can also use sliced roast beef. Even though it is thicker, since it is roasted already it should cook in the same time.
      • You can use any mixture of cheeses that you prefer to vary the flavor, but for best results make sure you choose ‘melty’ cheeses.
      • You can use Braggs Liquid Aminos if you prefer instead of the coconut aminos.

      Helpful Cooking and Recipe Links

      Podcast Episodes and You Tube Videos

      Substitutions

      • Don’t. Just buy the correct ingredients and you, too, shall have a fabulous outcome!
      • See Top Recipe Tips above.
      Sheet Pan Nutmegger Cheesesteak | Carrie Brown


      4 comments
      Add a comment...

      Your email is never published or shared. Required fields are marked *

      • Cindy l BaughJust put all the ingredients on my shopping list and ordered from Fox Hill. Thanks for the coupon code!ReplyCancel

      • Cindy l BaughOk, Miss Carrie Brown, I made this! It was Devine. My not-keto husband just kept getting up for more commenting on how good it was. I used a large sirloin for the meat as that is what I had and my Kroger is short on stuff right now. Did yours have a lot of pan juices? Mine did but it was not a hindrance.  Will definitely be maki g this often!ReplyCancel

      • JuliHi Carrie. I had most of the ingredients added celery as only had 1/2 a red capsicum.  Oh boy just delicious ?. Thank you. ReplyCancel

      • BethIt sounds delectable…but why do we need an entire T of nutmeg? ThanksReplyCancel

      How To Zest and Juice Lemons and Limes (VIDEO)

      Learn how to zest and juice lemons and limes! Cooking skills for any dietary lifestyle you are following – keto, paleo, lowcarb, whatever – here’s a fast and easy way to zest and juice lemons and limes!

      Simple hand juicer: https://amzn.to/3fhUCUH
      Microplane zester: https://amzn.to/3d4VEBA
      Tool for fancy zest: https://amzn.to/3fhUOTV

      ?‍? More fantastic keto recipe videos for you here: https://www.youtube.com/playlist?list=PLsAjYYF3K0dy_b74EVTGicZwJPS1Wl28F

      Handy equipment list: https://carriebrown.com/archives/23310
      Handy ingredients list: https://carriebrown.com/archives/23109

      ? Keto Recipes, Resources and fabulous Cookbooks: https://carriebrown.com

      ? Get THE INSIDE SCOOP: https://dogged-mover-1658.ck.page/a3e50a5b41

      ❤️ This how to zest and juice lemons and limes video made possible by the generous pledges from our Patreon supporters for whom we are profoundly grateful. Join our mission to help as many as we can! https://www.patreon.com/CarrieBrown


      0 comments
      Add a comment...

      Your email is never published or shared. Required fields are marked *