


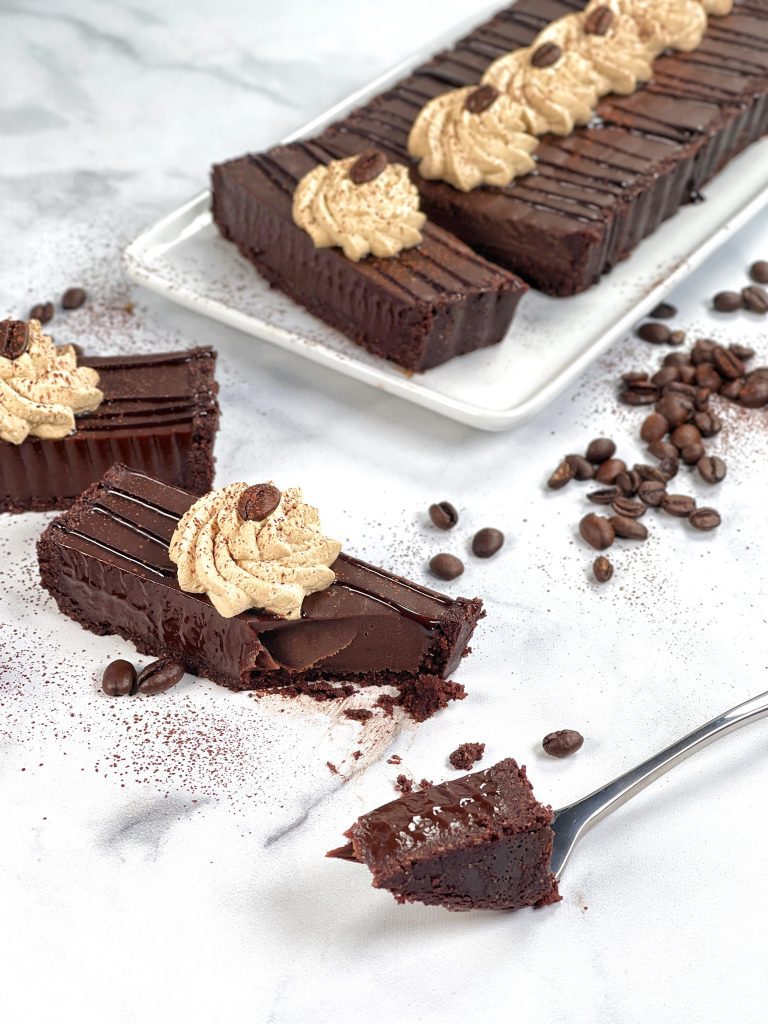
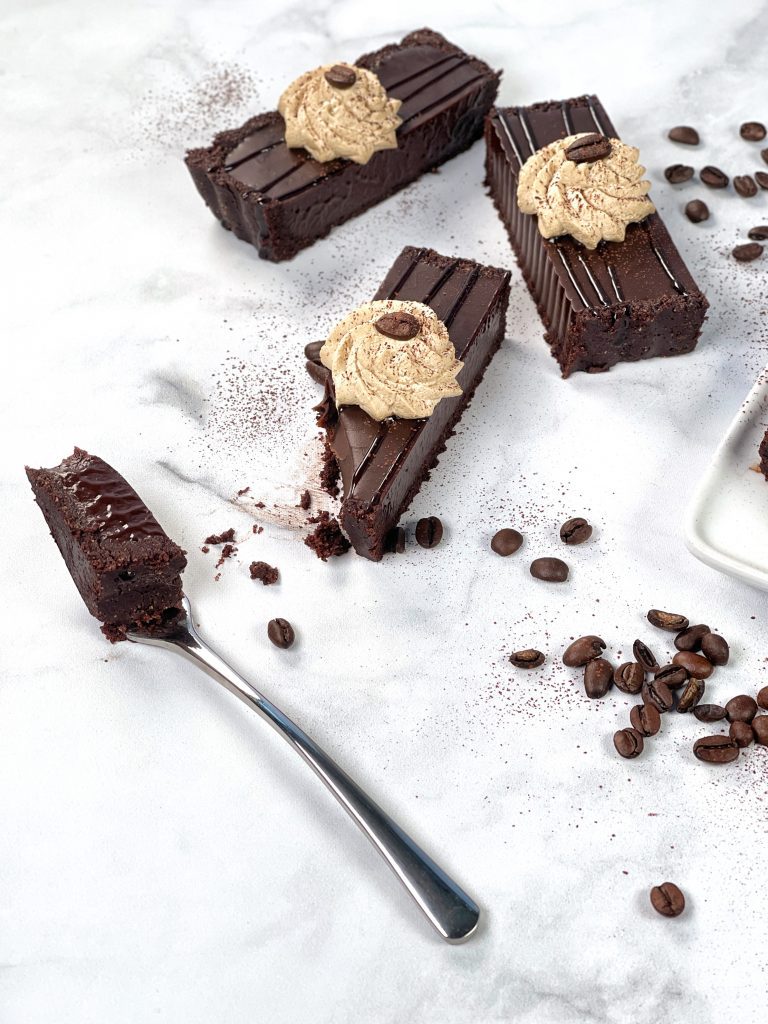
Chocolate. Coffee. Mix them together and make a French Patisserie-worthy dessert: Milk Chocolate Espresso Tart. Does life get any better?
This might look intimidating to the point of you breaking out in a cold sweat, but in reality it is simple, easy, and fantastically delicious. I walk you through it step-by-step. You, too, can create professional-looking and tasting tarts when you have a great recipe, good ingredients, and someone who cares to give you the right steps.
The crust for this Milk Chocolate Espresso Tart is the same crust I came up with 5 years ago for the Chocolate Cream Tart in my Keto for the Holidays Cookbook, except that I have changed the method to give you a better result!
It came about in the summer when I was creating Frozen Key Lime Pies for The Ice Cream of the Month Club, and I wasn’t happy with the ‘pie’ part because it became soggy when frozen. So I experimented with various ways to prevent that and ended up toasting the almond flour before I used it, and boy howdy it’s a huge winner for making no-bake, press-in crusts! It might seem weird the first time you try it, but once you taste the tart crust you’ll never want to do it any other way.
You can make this Milk Chocolate Espresso Tart in advance, and the first stage can be done several hours – or even a day – before the second, making it perfect for when you are cooking a lot of food or a lot of different dishes. Getting your dessert ready in advance equals way less stress and way more fun for you!

You will want to serve this Milk Chocolate Espesso Tart at every opportunity so grab some sugar-free milk chocolate chips and stash them in the pantry so you can dazzle your peeps year-round.
Milk Chocolate Espresso Tart
Author: Carrie Brown | Prep time: 40 mins | Cook time: 0 | Total time: 40 mins + chilling time | Serves: 12
What You Need
- 6 oz. / 170g almond flour
- 3 oz. / 85g erythritol
- 1 ½ oz. / 40g cocoa powder
- 3 ¾ oz. / 105g butter, melted
- 1 ½ cups / 12 fl oz. heavy cream
- 1 ½ oz. / 40g coffee beans, ground
- ¼ tsp. sea salt (For the best salt and a 15% discount use code: carriebrown)
- 2 tsp. vanilla extract
- 1 lb. / 450g sugar-free Milk Chocolate Chips
What You Do
Pre-Prep
- Lightly brush a 9” loose-bottomed pan with avocado oil. I used the largest of these rectangular tart pans, but you can use whatever shape you like. I used the rectangle just to give you inspiration and ideas. The important thing is that it has a loose bottom, otherwise getting your tart out of the pan is a problem.
- Put the almond flour in a dry skillet over a medium and toast until golden brown – about 4 minutes. Stir and turn often to ensure they toast evenly.
- Remove the almond flour from the heat, pour into a large bowl and allow to cool for 5 minutes.
- Stir in the erythritol and cocoa and mix well.
- Pour in the melted butter and mix until the dry ingredients are completely coated.
- Pour the nut mixture into an oiled, loose-bottomed tart pan of whatever shape you prefer and spread out evenly. Using a straight-sided glass press the almonds down firmly and evenly across the bottom of the pan and up the sides.
- Place pan in the fridge so that the crust firms.
- Put the heavy cream and ground coffee into a pan and heat until the cream just begins to bubble. Turn the heat off, stir, and leave to cool for 30 minutes.
- Place a fine mesh sieve over a bowl and pour the cream and coffee grounds through it. Discard the coffee grounds. Put them on your roses.
- Add the sea salt and vanilla extract and return the cream to the pan.
- Put the chocolate chips in the bowl the cream was in.
- Gently heat the cream until it just starts to steam.
- Quickly pour the hot cream over the chocolate chips and stir with a spatula until the chocolate is completely melted.
- Leave to cool for about 30 minutes.
- Remove the tart pan from the fridge and carefully pour the chocolate cream into the tart case.
- Gently tap one side or one end of the tart pan on the counter to make air bubbles rise to the surface and also to make the chocolate flow evenly into all the nooks and crannies of the tart case.
- Carefully place the tart back in the fridge and chill for at least 4 hours until set.
- Remove from the fridge a couple of hours before serving for the best texture. Remove it from the tart pan as soon as you remove it from the fridge as it is a lot stronger when very cold.
- Using a small knife gently run it between the tart and tart pan to release it.
- Stand the tart on a shallow bowl to make removing the pan rim easy.
- Leave the tart on the pan base and place it on your serving dish.
- I decorated mine by drizzling with sugar-free chocolate syrup. I poured some into a small piping bag (you can use a small Ziploc bag and snip the corner off) to give a very fine drizzle. Then I made some coffee whipped cream by adding espresso powder to heavy whipping cream and whipping to stiff peaks and piping directly on the tart. Then I dredged very lightly with cocoa powder and popped a coffee bean on top of each swirl of coffee whip.
Top Recipe Tips
- This looks complicated and seems to have a ton of steps, but it’s really simple and easy. You’ll see.
- This is very rich so plan on getting a lot of small servings out of this recipe.
- When you get it out the fridge you might see beads of moisture appear on the surface. Don’t panic! They will disappear when the tart comes to room temperature.
- Slice using a sharp knife that has been warmed under hot water and then wiped. It will make it much easier and you will be able to get clean slices like in the picture. After each cut, put under warm running water and wipe clean.
- You’re gonna want to put that coffee whip on everything.
- For dairy-free sub the heavy cream with thick (canned) coconut milk.
- DO NOT use 100% unsweetened chocolate. You can use any sugar-free chocolate you like but the taste will and the texture may be different. Not all chocolates are the same {insert heart emoji here}.
- This comes out pretty ‘dark’, but if you want to use dark chocolate chips you can. I recommend increasing the coffee beans to 2 ¼ oz. / 60g otherwise you won’t get much espresso flavor come through.
- Check out the Ingredients Guide for information on ingredients.
- Where Are The Macros and Nutritional Info?

Helpful Cooking and Recipe Links
- More chocolate recipes
- More no-bake recipes
- Come laugh and learn with us over at The Kitchen Podcast
- Come hang out in The Keto Kitchen Facebook Group
- For lots more great recipes check out our scrumptious cookbooks!
- Check out the categories and tags at the top of the post to help you find more recipes using certain ingredients or from certain categories.
- Discounts on great keto products and resources.

Podcast Episodes and YouTube Videos
- Watch Yogi’s Cooking Videos
- Watch Carrie’s Cooking Videos
- Watch our Cooking Tips and Tricks Videos
- How and Why to Measure Food
- Where Are The Macros and Nutritional Info?

THANK YOU FOR YOUR SUPPORT! YOU MAKE ALL THINGS POSSIBLE.
There *may* be an affiliate link or two in this post and I *may* receive a small commission from qualifying purchases in order to provide free content for you. As an Amazon Associate I earn from qualifying purchases.


